Showing posts with label AndroidRootTools ႏွင့္နည္းလမ္းမ်ား. Show all posts

Sony Xperia အျမင့္ ဖုန္းေတာ္ေတာ္ မ်ားမ်ားကို Root ေပးႏိုင္တဲ့ Easy Root Tool


ကြ်န္ေတာ္ ဒီ Tool ကို Z1 4.4.4 Root tool အေနနဲ႔ Post တင္ဖူးပါတယ္
ဒါေပမယ့္ ဒီ Tool ေလးရဲ႔ အသံုးျပဳႏိုင္ စြမ္းက တကယ္ကို ေကာင္းမြန္ လွပါတယ္ Sony Xperia အျမင့္ဖုန္း ေတာ္ေတာ္ မ်ားမ်ားကို Root ရပါတယ္ ..

ကြ်န္ေတာ္ စမ္းထားတာေတာ့
Xperia Z1 C 6903 4.4.4 , Xperia Z Ultra C6833 4.4.2, 4.4.4 , Xperia Z2 C6503 4.4.2
၃လံုးမွာ စမ္းျပီးပါျပီ အကုန္လံုး Bootloader Unlock လုပ္စရာ မလိုပါဘူး
ျမန္လဲျမန္ဆန္ပါတယ္
အသံုးျပဳနည္းကို ျပန္လည္ေျပာပါ့မယ္
~~~~~~~~~~~~~~~~
Easy Root Tool ကို ေအာက္မွာ ေဒါင္းယူပါ

Download Here


Down ရလာတဲ့ zip ဖိုင္ကို desktop ေပၚမွာျဖည္လိုက္ပါ Computer ကို အင္တာနက္ ခ်ိတ္ထားပါ
install ဆိုေသာ bat file ကို run လိုက္ပါ
လိုအပ္တဲ့ Towel root apk ကို download ဆြဲပါလိမ့္မယ္ ခဏေစာင့္ေပးပါ
ျပီးလ်ွင္ ကြန္ျပဳတာႏွင့္ဖုန္းကို ခ်ိတ္ေပးလိုက္ပါ

ဖုန္းမွာ usb debugging တို႕ unknow sources တို႕ဖြင့္ထားပါ ဖုန္းႏွင့္ကြန္ျပဳတာ ကိုၾကိဳးခ်ိတ္လိုက္ရင္ လိုအပ္တဲ့
ဖိုင္မ်ားကို အလို အေလ်ာက္ သြင္းေပးသြားမွာပါ

Cleaning up ဆိုတဲ့ စာသားေပၚလာရင္ ၾကိဳးျဖဳတ္လိုက္ပါ ဒါဆို Root ရပါျပီ
Super user ေတာ့ေပၚမွာမဟုတ္ပါဘူး SuperSu version အျမင့္ တခုခု ထည့္ေပးလိုက္ပါ
ဒါဆိုရင္ သင့္ဖုန္းမွာ Root Access ရရွိေနပါျပီ...

Xperia အျမင့္ဖုန္းေတာ္ေတာ္မ်ားမ်ား အဆင္ေျပပါတယ္ အခ်ိန္ကုန္လည္းသက္သာပါတယ္
Mobile Service သမားေတြေဆာင္ထားသင့္တဲ့ tool ေကာင္းေလးျဖစ္ပါတယ္...

~~~~~~~~~~~~~~~~~~~~~~~~~~~~~~~~~~~~

အဆင္ေျပပါေစ
Credit : myanmarmobileapp.com

C8816,C8816D Unlock Bootloader,Auto Root,Auto Myanmar Font


Screenshot - 4_11_2014 , 10_59_22 AM

Screenshot - 4_8_2014 , 11_52_18 AM

Screenshot - 4_11_2014 , 10_54_54 AM


C8816,C8816D ေတြကုိ တစ္ခါထဲ ျမန္မာေဖာင့္,UnlockBootloader,Root Access
အစရွိတာေတြကုိတစ္ခါထဲထည့္ေပးသြားမွာပါ။ Tool ထဲမွာ Instruction အျပည့္အစုံ
ျမန္မာလုိေရးေပးထားပါတယ္။
 

အရင္ Version 1.0 မွာ Tool Instruction မွာ ျမန္မာလုိ မေပၚတာေကာ
Window Username မွာ Space ပါေနရင္မရတာကုိေကာ ျပင္ဆင္ေပးထားပါတယ္
 
 
ဒီ Tool ကုိ ဒီမွာ ေဒါင္းပါ။

 Credit MMSD

Download Root Zenfone 1.3r.apk


ASUS Zenfone 5 နဲ႔ 6 တို႔ကို ဖုန္းထဲမွာတင္ အလြယ္တစ္ကူ root လုပ္ေပးနိုင္တဲ့ Apk သစ္ေလးေတြ႔လို႔ လိုအပ္တဲ့သူမ်ား အသံုးျပဳနိုင္ေအာင္ တင္ေပးလိုက္ပါတယ္။ ေအာက္ကလင့္ေလးမွာယူလိုက္ပါ။
ဒီ apk ေလးနဲ႔ root လုပ္နိုင္တာေတြကေတာ့ ASUS Zenfone 5 နဲ႔ 6 CN /WW/TW version 4.3 /4.4 တို႔ကိုသာလွ်င္ root လုပ္ေပးနိုင္ပါတယ္။ ဒီေကာင္ေလးကို ဖုန္းထဲမွာ install လုပ္ျပီး root မလုပ္ခင္ ဖုန္းမွာခ်ိတ္ဆက္ထားတဲ့ wifi / mobile data တို႔ကိုပိတ္ျပီး အသံုးျပဳဖို႔ မေမ့ပါေစနဲ႔ ဒါမွမဟုတ္ Flight Mode ကိုဖြင့္ျပီးေတာ့လဲ အသံုးျပဳနိုင္ပါတယ္။
အစင္ေျပပါေစ။ 
 
 http://htwenaingwin.blogspot.com/

How to Root Galaxy Trend Plus S7580 on Android 4.2.2 Jelly Bean and Install CWM Recovery

cbox မွာ ေတာင္းဆိုထားတဲ့ အကိုတစ္ေယာက္အတြက္ပါ။ လုပ္နည္းက လြယ္လို႔ မူရင္အတိုင္ပဲတင္ေပးလိုက္ပါတယ္။အစင္မေျပရင္ ေအာက္မွာ comment ေလးထားခဲ့ပါ။


1. Install USB Drivers for Samsung Galaxy Trend Plus on your computer.
2. Enable USB Debugging Mode on the phone by navigating to Settings >> Developer Options.
3. Make a backup of all your important data before following the guide.
4. The Galaxy Trend Plus should be factory unlocked and not locked to any particular carrier.
5. Ensure the battery of the phone is charged more than 80 percent.
6. The CWM recovery works only on the Galaxy Trend Plus (GT-S7580). Applying this on any incorrect variant might brick the device. Verify the model number of the Galaxy Trend Plus by selecting Settings >> About Phone.

Files Required
1. CWM (Mirror Link)
2. SuperSu (UPDATE-SuperSU-v1.34.zip) or the latest version
3. Odin 3.07 (Mirror Link)

Steps to Install CWM Recovery on Galaxy Trend Plus S7580
Step 1: Extract the CWM recovery and Odin 3.07 files using WinRAR/7-Zip/WinZip or any other extracting tool.
Step 2: Copy the SuperSU .zip file to the SD card of your phone.
Step 3: Switch off the Galaxy Trend Plus. Then boot the device into Download Mode by pressing and holding Volume Down, Home and Power buttons together until a construction Android robot icon with a warning triangle appears on screen. Now press the Volume Up button to enter Download Mode.
Step 4: Run Odin on the computer as an Administrator.
Step 5: Connect the Galaxy Trend Plus to the computer using USB cable while it is in the Download Mode. Wait until Odin detects the device. When the device is connected successfully, the ID: COM box will turn to light blue with the COM port number. Additionally, the successful connected will be indicated by a message saying Added.

Note: If the Added message does not appear, then try re-install USB drivers or changing the port on the computer.

Step 6: In Odin, click the PDA button and select the recovery.tar.md5 file. Verify that F. Reset Time, Auto Reboot and Re-Partition options are NOT selected.
Step 7: Double-check and click Start button in Odin. The installation process will now begin.
Step 8: Once the installation process completes, you will see a PASS message with green background in the left-most box at the very top of the Odin. You can now unplug the USB cable to disconnect your device from the computer and then go to Step 9.

Steps to Root Galaxy Trend Plus S7580 via CWM Recovery
Step 9: Boot the device into CWM recovery by pressing and holding Volume Up, Home and Power buttons together.
Step 10: In CWM recovery, select "install zip from sdcard" and then select "choose zip from sdcard". Now, navigate to the SuperSU .zip file that you copied earlier and confirm the installation by selecting Yes.
Step 11: Once the installation process completes, return to main recovery menu and select "reboot system now".

Samsung Galaxy Trend Plus S7580 running on Android 4.2.2 Jelly Bean is now rooted successfully. You can now install any app that requires root permission. Verify the root status of the device by downloading Root Checker app from Google Play Store.

Screenshot: Install CWM recovery via Odin

Thank's to all fellas at XDA who first tried out this rooting technique. This root method was originally posted via XDA-Developers original thread.


facebook မွာ အသစ္တင္တိုင္း ဖတ္ခ်င္လွ်င္ေအာက္ကလင့္မွာ like လုပ္ပါ။
Myanmar Tech (အိုင္တီ)
ကြန္ပ်ဴတာနည္းပညာ


Download လုပ္နည္းမ်ားမသိပါက ဒီမွာဖတ္ေပးပါ..
 

ဖုန္းထဲကေန Root ေဖာက္ရာမွာ နာမည္ၾကီး Root Master 2.1.2 APK New Version


ဒီ Root Master ဆိုတဲ့ Root Tools ဟာဆိုရင္ အျခားနာမည္ၾကီး Root Tools ေတြရဲ႕ Feature ေတြနဲ႕ ေပါင္းစပ္ဖန္တီးထားတယ္လို႕ဆိုပါတယ္.. ပံုမွာေပါ့ Nexus 4.3 ကို Root ျပထားပါတယ္
မိမိကိုယ္တိိုင္ Root လုပ္ၾကည့္ခ်င္သူမ်ားလဲ အႏၱရာယ္ကင္းကင္းျဖင့္ စမ္းသပ္ၾကည့္ႏိုင္ပါတယ္...လိုအပ္သူ
မ်ား Download ရယူႏိုင္ပါၿပီ။


Download From => Download Link Collection
Zippyshare/Miloshare/Solidfiles တို႕တြင္တင္ေပးထားပါသည္။


facebook မွာ အသစ္တင္တိုင္း ဖတ္ခ်င္လွ်င္ေအာက္ကလင့္မွာ like လုပ္ပါ။
Myanmar Tech (အိုင္တီ)
ကြန္ပ်ဴတာနည္းပညာ


Download လုပ္နည္းမ်ားမသိပါက ဒီမွာဖတ္ေပးပါ..
 

sony phone သမားေတြ အတြက္ bootloader unlock အလြယ္တစ္ကူ လုပ္မယ္


Sony phone  သမားေတြ root ေဖာက္တဲ ့ေနရာမွာ  bootloader unlock  အလြယ္တစ္ကူ လုပ္လုိ ့ရပါျပီ။
ဒီေဆာ ့ဝဲ ေလး ကို  မိမိတို ့ pc မွာ install လုပ္ျပီး  unlock  လုပ္ခ်င္တဲ ့  မိမိတို ့ရဲ ့   ဖုန္း နွင္ ့ ခ်ိတ္ဆက္ျပီး  unlock  လုပ္လို ့ အလြယ္တစ္ကူ ရပါျပီ။  sony သမားတိုင္းနွင္ ့ ဆိုင္လက္ဆြဲ ေပါ ့ဗ်ာ သူ ့ကို အသံုး ျပဳမယ္ ဆိုရင္ ေတာ ့ အင္တာနက္  ကြန္နက္ရွင္ ေတာ ့ လိုအပ္ပါတယ္။      အသံုးျပဳမယ္ ဆို ရင္  ေအာက္မွာ ေဒါင္းလုပ္ ယူ လုိက္ပါ။
ေဒါင္း ရန္  , zippyshare , solidfiles

ref ; smart ghost


facebook မွာ အသစ္တင္တိုင္း ဖတ္ခ်င္လွ်င္ေအာက္ကလင့္မွာ like လုပ္ပါ။
Myanmar Tech (အိုင္တီ)
ကြန္ပ်ဴတာနည္းပညာ


Download လုပ္နည္းမ်ားမသိပါက ဒီမွာဖတ္ေပးပါ..
 

ဖုန္းထဲကေန Root ေဖာက္ေပးတဲ့ 360 Super ROOT v1.1 APK


360 Super ROOT ဟာ သိပ္မထင္ရွားတဲ့ Root apk ေလးတစ္ခုျဖစ္ပါတယ္.. Version 1.0 တုန္းက လိုအပ္ခ်က္ေတြကို ထပ္မံျပင္ဆင္ၿပီး 11.3.2014 ရက္ေန႔မွာ Update Version အေနနဲ႔ ထပ္မံ ထုတ္ေပးလိုက္ပါတယ္.. Android 4.2 ထိ Root ႏိုင္ၿပီး Support Model စာရင္းေတာ့ မေတြ႕မိပါဘူး. ဘာပဲျဖစ္ျဖစ္ ဖုန္းထဲကေန Root ေဖာက္ႏိုင္တဲ့ apk ေလးတစ္ခုေတာ့ဆိုေတာ့ မည္သူမဆို အႏၱရာယ္ကင္းကင္းနဲ႕ စိတ္ခ်လက္ခ် ျပဳလုပ္ႏိုင္ၾကပါတယ္..


-

Today, Android phones, preloaded applications flooding the phone with a long running particularly slow, however uninstall pre-installed applications and the phone handset deep management needs to have ROOT privileges. 

   Recently, 360 launched 360 Super ROOT, you can let the phone without having to plug cable to the computer, you can easily get the phone ROOT privileges. 

  Green, safe, free, easy to use. 

   Note: Not all phones can use the super successful ROOT, ROOT, if unsuccessful, to welcome a key ROOT PC using the 360 version, the PC version higher success rate. 

  We are unique [ROOT] 

   1, the most secure: 360 unique security detection mechanisms, more than seven years in terms of security cumulative, with 360 license management, comprehensive protection against malicious programs on your phone privileges apply; 

   2 The most comprehensive: Support more than 500 brands, 9000 models of mobile phones, if not super-ROOT support can also use the PC version - 360, key ROOT 

  3, the most efficient: continually update the program to support your phone is faster at your service


facebook မွာ အသစ္တင္တိုင္း ဖတ္ခ်င္လွ်င္ေအာက္ကလင့္မွာ like လုပ္ပါ။
Myanmar Tech (အိုင္တီ)
ကြန္ပ်ဴတာနည္းပညာ


Download လုပ္နည္းမ်ားမသိပါက ဒီမွာဖတ္ေပးပါ..
 

China ထုတ္ Android ဖုန္းေတြကို အလြယ္တကူ Root ေဖါက္ႏိုင္တဲ႔ Root Tool


China ထုတ္ ဖုန္းေတြ ေတာ္ေတာ္မ်ားမ်ားကို အလြယ္တကူ Root ေဖါက္ႏိုင္တဲ႔ Tool ေလးပါ..  အားလံုး စမ္းသပ္လို႔ရေအာင္ ျပန္လည္မွ်ေဝေပးလိုက္ပါတယ္...။ Huawei C8816 ကိုေတာင္ အလြယ္တကူ Root ႏိုင္တယ္လို႔ ဆိုထားပါတယ္..။

1: Open the usb debug mode in the phone, if you do not know how to open it, 
2: Then check the phone has no connection with good computer data lines, to ensure mobile   phones and computers connected properly
3: Then download the above down to extract root kit on the computer,
4: Then after a double click to open the unzipped EXE suffix, if usb debugging turned on, and also installed on the computer, then driven, root software will automatically recognize the phone, open the root software, remember to remove the one hook, otherwise it will automatically install many other software.
5: Then click on [now] button to start automatic root root up.
6: After the completion of root will show your phone has been successfully obtain root privileges.


 ဝင္းကမာၻေက်ာ္

www.winkabarkyaw.net


facebook မွာ အသစ္တင္တိုင္း ဖတ္ခ်င္လွ်င္ေအာက္ကလင့္မွာ like လုပ္ပါ။
Myanmar Tech (အိုင္တီ)
ကြန္ပ်ဴတာနည္းပညာ


Android 1.6 မွ 4.4.2 ကို Root လုပ္မယ္ ကြန္ပ်ဴတာမလို ဖုန္းထဲမွာတင္ တစ္ခ်က္ႏွိပ္ရုံပါပဲ


Framaroot ဆိုတဲ့ Apk ေလးပဲျဖစ္ပါတယ္ ဖုန္းထဲမွာ Install လုပ္ၿပီး 
Install Superuser (သို႕မဟုတ္)Install SuperSUႏွိပ္ပါ 
ဒီလို စာေလးေပၚလာပီး OK ႏွိပ္လိုက္လွ်င္ ဖုန္း ပိတ္သြားပါမယ္ ျပန္တက္လာရင္ေတာ့ Root ကိုရရွိပါၿပီ

လိုအပ္လွ်င္ေအာက္မွာ Download ႏိုင္ပါတယ္


From Copy ၊ Solidfiles


facebook မွာ အသစ္တင္တိုင္း ဖတ္ခ်င္လွ်င္ေအာက္ကလင့္မွာ like လုပ္ပါ။
Myanmar Tech (အိုင္တီ)
ကြန္ပ်ဴတာနည္းပညာ


Download လုပ္နည္းမ်ားမသိပါက ဒီမွာဖတ္ေပးပါ..
 

Nokia X, X+ and XL ေတြကို Root ေဖါက္နည္း

 Nokia X , X+ , XL ေတြကို Root ေဖါက္နည္းေလးပါ.. စမ္းစရာမရွိေသးလို႔ မူရင္းအတိုင္း ျပန္လည္မွ်ေဝေပးလိုက္ပါတယ္..။ Framaroot 1.9.1 ဆိုတဲ့ APK ေလးကို Phone ထဲမွာပဲ Install လုပ္ျပီး Root လုပ္ေပးရမွာမို႔ လြယ္ကူ အဆင္ေျပေစမွာပါ...။

How To Root Nokia Normandy X, X+ and XL

  1. Enable USB Debugging on your device.
  2. You device must be charged 50% minimum.
  3. Make a Backup of all your important data stored in device.
  • Download Framaroot apk file in your device.
  • Use a file manager app (Astro or ES File Explorer, for example), navigate to the location of Framaroot-1.6.1.apk, and install the application.  Make sure you have enabled installation of apps from unknown sources by going to Settings > Security and ticking the Unknown sources checkbox.
  • Go to your app drawer and open up the Framaroot app.
  • Select Install SuperSU from the drop-down menu and tap on Grandalf.
  • Wait for the success popup.
  • Reboot your device.
That's it!! Your Nokia Android smartphone is successfully rooted now. 
 Credit : XDA
  
www.winkabarkyaw.net


facebook မွာ အသစ္တင္တိုင္း ဖတ္ခ်င္လွ်င္ေအာက္ကလင့္မွာ like လုပ္ပါ။
Myanmar Tech (အိုင္တီ)
ကြန္ပ်ဴတာနည္းပညာ
အဆင္ေၿပပါေစ။အဆင္ေၿပရင္facebook မွာ like လုပ္ပါအုံး။
အဆင္မေၿပရင္၊လိုအပ္တာရွိရင္ comment ေပါ့။


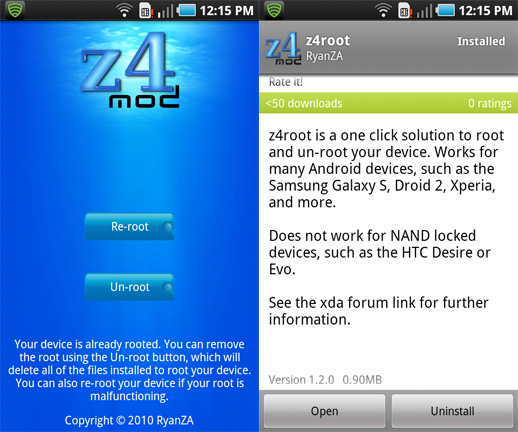
z4Root v 1.3.0 for android(latest versionn0


Android phone/Tablet ကုိင္ေဆာင္သူမ်ားအတြက္ မိမိတုိ႕ဖုန္းထဲမွာတင္ root လုပ္ေပးႏုိင္မယ့္ေဆာ့၀ဲလ္ေလး z4root ကုိတင္ေပးလုိက္ပါတယ္။ဒီေဆာ့၀ဲလ္ေလးကုိ ဖုန္းထဲမွာ install လုပ္ျပီး(one click)အသုံးျပဳရုံပဲျဖစ္ပါတယ္။Root ေဖာက္ဖုိ႕အတြက္ ကြန္ပ်ဴတာမလုိအပ္တာေၾကာင့္ ေဆာင္ထားသင့္တဲ့ေဆာ့၀ဲလ္ေလးျဖစ္ပါတယ္။ဖုန္းေတာ္ေတာ္မ်ားမ်ားကုိ Root ျပဳလုပ္ႏုိင္တာေတြ႕ရပါတယ္။Samsung,Htc,huawei,sony…စတဲ့ ဖုန္းေမာ္ဒယ္ေတာ္ေတာ္မ်ားကုိ Root ေဖာက္ႏုိင္မွာပါ။ support ေပးထားတဲ့ Device စာရင္းကေတာ့ ေအာက္ပါအတုိင္းပါ။
Samsung Galaxy S (All variants)
Backflip
Sony X10
Xperia Mini
Droid 2
Galaxy Tab
Galaxy I5700
Galaxy 3 I5800
Droid X
Samsung Acclaim
Cricket Huawei Ascend
Motorola Cliq
Huawei 8120
Hero
G1
Optimus T
Droid 1
Garmin Asus A50
Motorola Defy
LG Ally
Motorola Flipside
Motorola Milestone 2
Dell streak
X10 Mini Pro
Smartq v7 android 2.1
Not compatible with PERMANENT root option
Desire (requires nand unlock)
Desire HD (requires nand unlock)
Magic (unknown)
Evo (requires nand unlock)
G2 (requires nand unlock)
Archos 70 (unknown)
myTouch 3G (unknown)
Wildfire
Droid Incredible
ရယူအသုံးျပဳလုိသူမ်ားေအာက္မွာယူႏုိင္ပါျပီ။


http://www.apk4.info/wp-content/plugins/download-monitor/download.php?id=423
www.myanmartechit.blogspot.com
အဆင္ေၿပပါေစ။အဆင္ေၿပရင္facebook မွာ like လုပ္ပါအုံး။
အဆင္မေၿပရင္၊လိုအပ္တာရွိရင္ comment ေပါ့။


LG G Flex ကုိ Root လုပ္နည္း


LG ရဲ႕အသစ္ထြက္ဖုန္းျဖစ္တဲ့ LG G Flex ကုိ Root လုပ္ခ်င္သူေတြအတြက္ LG G Flex ကုိ Root လုပ္နည္းကုိတင္ဆက္ေပးလုိက္ပါတယ္။
အရင္ဆုံးလုိအပ္တဲ့ Tool ေတြကုိရယူထားပါ။
LG Mobile Driver အားရယူရန္
IOroot အားရယူရန္
လုိအပ္တဲ့ Tool ေတြကုိရယူျပီးျပီဆုိရင္ေတာ့ LG Mobile Driver ကုိကြန္ပ်ဴတာမွာသြင္းထားပါ။ download လုပ္လုိ႕ရလာတဲ့ IOroot ဇစ္ဖုိင္ကုိေတာ့ ဇစ္ျဖည္ျပီး ရလာမယ့္ Folder ေလးကိုကြန္ပ်ဴတာ desktop ေပၚမွာပဲခဏထားလုိက္ပါ။
ျပီးရင္ဖုန္းနဲ႕ကြန္ပ်ဴတာကုိ USB ၾကိဳးအသုံးျပဳျပီးခ်ိတ္ဆက္ပါ။ ျပီးရင္ USB Mode ကေန Charge Only Mode သုိ႕ေျပာင္းထားပါ။ ျပီးရင္ ခုနတုန္းက Desktop ေပၚမွာတင္ထားခဲ့တဲ့ IOroot folder ထဲက root.bat ကုိ run လုိက္ပါ။ ေအာက္ကပုံအတုိင္း Command Box ေလးနဲ႕ေပၚလာျပီဆုိရင္ Enter ေခါက္လုိက္ရုံပါပဲ။


ဖုန္းက reboot က်သြားျပီးျပန္တက္လာရင္ေတာ့ သင့္ဖုန္းက root လုပ္ျပီးျဖစ္ေနပါျပီ။ အားလုံးပဲအဆင္ေျပၾကလိမ့္မယ္လုိ႕ေမွ်ာ္လင့္ပါတယ္။
Thet Naing Soe (Myanmar Mobile App Store)
https://www.facebook.com/thetnaing.mmas?ref=tn_tnmn
www.myanmartechit.blogspot.com
အဆင္ေၿပပါေစ။အဆင္ေၿပရင္facebook မွာ like လုပ္ပါအုံး။
အဆင္မေၿပရင္၊လိုအပ္တာရွိရင္ comment ေပါ့။

ဆရာကိုသူရိန္စိုးဖန္တီးထားေသာ All In One Huawei Root Tool ( 85 MB )


ဆရာကိုသူရိန္စိုးရဲ႕All In One Huawei Root Tool ျဖစ္ပါတယ္.. Huawei ေတြ အားလံုး Root ႏိုင္ဖို႔ ေဒါင္းယူထားသင့္ပါတယ္.. ဆရာသူရိန္စိုးကို ေက်းဇူးတင္ပါတယ္..
 

Download => Solidfiles / Mediafire

Software ကို Run သည့္အခါ Passwords ေတာင္းေနလွ်င္ solar ဟုထည့္ေပးပါ
www.myanmartechit.blogspot.com
အဆင္ေၿပပါေစ။အဆင္ေၿပရင္facebook မွာ like လုပ္ပါအုံး။
အဆင္မေၿပရင္၊လိုအပ္တာရွိရင္ comment ေပါ့။

SD Card ကို Phone Storage လုပ္မယ္ ( Root Need )


အခ်ိဳ ႔ Samsung phone ေတြက Bluetooth ကူးတာ Dowload ဆြဲတာတို႔ကို Phone Storage ထဲကို သြားသိမ္းပါတယ္..ကင္မရာရိုက္ရင္လည္း Phone Storage ထဲသြားသိမ္းတာပဲ... Setting ထဲကေနလည္း သြားခ်ိန္လို႔မရဘူးေနာ္...အဲဒီေတာ့ SD Card ကို Phone Storage လုပ္ေပးလိုက္မယ္ဆိုရင္အဆင္ေျပသြားတာေပါ့....
လုပ္နည္းကေတာ့ လြယ္ပါတယ္.. Root Explorer နဲ႔ System ထဲကုိ သြားျပင္ေပးရမွာပါ....( need root )

root explorer > system / etc ထဲက vold.fstab ဆိုတဲ့ file ကို နည္းနည္းေလးၾကာေအာင္ဖြင့္ျပီး Open in text editor နဲ႔ ဖြင့္လိုက္ပါ....  r/o  ကို  r/w  ေျပာင္းထားရမယ္ေနာ္...
ေအာက္က စာေလး 2 ေၾကာင္းကို ေတြ႔ေအာင္ရွာပါ.....

Text က Phone တခုနဲ႔ တခု တူခ်င္မွတူမွာေနာ္...အခုဟာကေတာ့ Huawei ထဲကပါ....ေသခ်ာရွာေနာ္...ဆင္တူရုိးမွားေလးေတြရိွတယ္...

dev_mount sdcard /mnt/sdcard emmc@fat /devices/platform/goldfish_mmc.0 /devices/platform/mtk-sd.0/mmc_host

dev_mount sdcard2 /mnt/sdcard2 auto /devices/platform/goldfish_mmc.1 /devices/platform/mtk-sd.1/mmc_host 

အခု ကြ်န္ေတာ္တို႔က mnt ရဲ ႔ေနာက္က sdcard နဲ႔ sdcard2 ကို ေနရာခ်င္း Change ေပးရမွာပါ...

" sdcard    ရဲ ႔ေနာက္မွာ 2 ထည့္ျပီး
sdcard2 ကို ေနာက္က 2 ဇ်က္ေပးလိုက္ပါ..."

ျပီးရင္ menu > save လုပ္ျပီး Restart ခ်ေပးလိုက္ပါ...Reboot တက္လာရင္ Storage ထဲ သြားၾကည့္လိုက္ပါ....SD က Phone Storage ေျပာင္းေနမယ္ေနာ္......

စမ္းခ်င္သပဆိုရင္ စမ္းႏုိင္ပါတယ္...တခုခုျဖစ္သြားရင္ေတာ့ တာ၀န္မယူဘူးေနာ္....ေပးထားတဲ့ Guide အတိုင္းလုပ္ရင္ေတာ့ အဆင္ေျပမွာပါ....

ကြ်န္ေတာ္ လုပ္ၾကည့္တာေတာ့ အဆင္ေျပပါတယ္.... ေက်းဇူးးးးးးးးးးးး

By : yewintun


www.myanmartechit.blogspot.com
(အေၿခခံနည္းပညာမ်ားၿပန္လည္မွ်ေဝျခင္း)
အဆင္ေၿပပါေစ။အဆင္ေၿပရင္facebook မွာ like လုပ္ပါအုံး။
အဆင္မေၿပရင္၊လိုအပ္တာရွိရင္ comment ေပါ့။


Android Phone ေတြကို စိတ္ၾကိဳက္ျပဳျပင္ေပးႏိုင္တဲ႔ Android All In One Toolkit

AVG Internet Security


  Android Phone ေတြကို စိတ္ၾကိဳက္ျပဳျပင္ေပးႏိုင္တဲ႔ Android All In One Toolkit ေလးပါ .. ကလိတာဝါသနာပါသူေတြနဲ႔ ဆိုင္သမားေတြအတြက္ေတာ့ အဆင္ေျပေစမွာပါ...။ သူလုပ္ေဆာင္ႏိုင္တာေတြကေတာ့ ကုန္ႏိုင္ဖြယ္ပါပဲ... ေအာက္မွာ ဆက္လက္ေလ့ၾကည့္လိုက္ပါ..။


Description :
I Made This tool for making workflow more easier for stuff like transfering data from pc to phone and phone to pc . Rather than connecting mass storage via USB you can transfer data using this tool via adb. No need of any command just use this tool for stuff like

Features:
1. Fast Data Transfer Using adb ( Instead Of SD Card Mounting )
2. Tweaks for Android
3. Build Prop Editor
4. Android APK Manager

Requirements:
1. Android Device Connected To PC in Debugging Mode Enabled
2. USB Drivers Should Be Installed

User Manual :

1. Fast Data Transfer Using adb ( Instead Of SD Card Mounting ):
We used to transfer our data in mobile phone by connecting SD Card to pc but As per my experience it takes much time to connect for bulky SD Cards . So By using this feature You can pull data from device or push data from device
Pulling Data From Phone :
Just select the folder of SD card from which you want to pull data Viz. download , music ,videos I Made ready made option for that You can even set custom folder by giving path in that field like : /sdcard/Documents/
Pushing Data To phone:
In case you want to transfer a file to phone Browse that file and select the destination folder of your SD Card viz. download , music ,video or even custom path

2. Tweaks :
Most android users love android tweaks I made some tweaks for android like Unlock Pattern And Unlock Pin/Password On A Single Click ( *ROOT REQUIRED* ) . More Tweaks will be adding soon as per suggestions and requests

3. Build Prop Editor :
You can modify build properties directly using this application . ( * ROOT REQUIRED* ). This is risky part So Carefully modify build properties.

4. APK Manager:
Many people takes backup of their android apk apps. So when you havebackup and want to install to phone directly , use this feature. Browse the apk file and click on install Apk wait for progress bar to complete installation . & Yap.. App is installed.


www.myanmartechit.blogspot.com
(အေၿခခံနည္းပညာမ်ားၿပန္လည္မွ်ေဝျခင္း)
အဆင္ေၿပပါေစ။အဆင္ေၿပရင္facebook မွာ like လုပ္ပါအုံး။
အဆင္မေၿပရင္၊လိုအပ္တာရွိရင္ comment ေပါ့။


ANDROID ဖုန္းေတြမွာ MEMORY အလိုအေလ်ာက္ျပည့္လာတာကုိ ေျဖရွင္းဖို႔နည္းလမ္း တစ္ခု႔


4.0 နဲ႔ အထက္ဖုန္းေတြကိုင္တဲ့သူတိုင္း 
ၾကံဳရမဲ့အျဖစ္ကေလးနဲ႔ ေျဖ႐ွင္းရမဲ့နည္းလမ္းေလးေတြ ေျပာျပခ်င္ပါတယ္ ။
 2.3 ေတြေတာ့မမွတ္မိေတာ့ဘူးဗ် ခြင့္လႊတ္ေပးပါ 
အဲဒါကေတာ့ sd ကဒ္ထဲမွာ ကိုယ္က data ေတြကို 2 Gb ေလာက္ပဲထည့္ထားေပမယ့္ 4 Gb sdကဒ္ 
တစ္ခုလံုးျပည့္လုနီးပါးျဖစ္ေနတာ ေျပာရရင္ dcim folder ထဲက .thumbnail folder 
ဖိုင္ဆိုဒ္တအားႀကီးလာတာကိုေျပာတာပါ 
 အမ်ားအားျဖင့္ေတာ့ photo, video ေတြအထည့္မ်ာ gallery အၾကည့္မ်ားတဲ့သူေတြမွာ ျဖစ္တတ္ပါတယ္ 
ကြၽန္ေတာ္ဆိုရင္ 16 Gb sd ကဒ္ကိုသံုးပါတယ္ သူငယ္ခ်င္းေတြကို စဖို႔ေနာက္ဖို႔ photo coment ေတြက
 ပံုေပါင္း 1000 ေက်ာ္ေလာက္ ေဒါင္းထားတဲ့ video ေတြက 300 ေလာက္ဆိုေတာ့ data ေတြက စုစုေပါင္း 6 
Gb ေလာက္သံုးထားတယ္ ခင္ဗ် ဖုန္းကိုသံုးၿပီးလို႔ နာရီပိုင္းေလာက္ ၾကာလို႔ storage 
ကိုၾကည့္လိုက္ရင္ ျပည့္လုလုျဖစ္ၿပီး အပိုက 8Gb ေလာက္ျဖစ္သြားတယ္ အဲဒါနဲ႔ thumb ေတြကို႐ွာဖ်က္ 
ၿပီးျပန္တက္နဲ႔ သံသရာလည္ေနေတာ့ မျဖစ္ေတာ့ဘူးဆိုၿပီး android forum ေတြလိုက္ေမႊေတာ့ 
ကိုယ္လိုလူေတြအမ်ားႀကီးေတြ႕တယ္ဗ် နည္းလမ္းကလည္းအစံုဗ် သူငယ္ခ်င္းတစ္ေယာက္က nomedia
 folder ေဆာက္ဆိုလို႔စမ္းၾကည့္တယ္ မရဘူး တစ္ေယာက္က nomedia က folder မလုပ္ရဘူး file 
အသစ္ေတာင္းၿပီး name ေျပာင္းေပးရမွာဆိုလို႔ လုပ္ၾကည့္လဲ မရ ျပန္ၿပီး တက္တာပဲ ေနာက္ဆံုးေတာ့ 
အဆင္ေျပတဲ့နည္းေလးေတြ႔တယ္ဗ် အဲ့ဒါကေတာ့ root explorer ေနာက္ဆံုး 
ဘား႐ွင္းေလးကိုသံုးၿပီး ေျဖ႐ွင္းတဲ့နည္းပါ ပထမဆံုး setting > manange app> all tab ကိုသြားၿပီး 
gallery နဲ႔ media storage app ႏွစ္ခု ကို clear data နဲ႔ force stop လုပ္ေပးၿပီး ဖုန္းကို reboot 
ခ်ပါ ျပန္တက္လာရင္ rootexplorer apk ကေန sd card > dcim> .thumbnail folder ထဲဝင္ပါ အဲ့ထဲမွာ 
ဖိုင္ဆိုဒ္ႀကီးတဲ့ thumbnail တစ္ဖိုင္ဒါမွမဟုတ္ ႏွစ္ဖိုင္ (အမ်ားအားျဖင့္ .thumbdata3-19672902099) နဲ႕ 
ပံုေလးေတြေတြ႕ပါလိမ့္မယ္ အဲဒီ thumb ဖိုင္ေလးရဲ႕ name ကို ေသေသခ်ာခ်ာ ၾကည့္ၿပီး 
စာရြက္ေပၚမွာကူးေရးထားပါ ဒါမွမဟုတ္ ဖိထားၿပီး rename ႏိွပ္လိုက္ၿပီး name ကို copy ယူထားပါ ၿပီးရင္ 
ဖိုဒါထဲမွာ ႐ွိတဲ့ ဖိုင္ေတြအကုန္ဖ်က္ပါ ဖ်က္ၿပီးမွ rootexplorer ရဲ႕ေအာက္ေျခက အေပါင္းသေကၤတေလး 
ကိုႏွိပ္ၿပီး file ကိုေရြးပါ ခုနက မွတ္ခဲ့တဲ့ name ကိုေပးပါ အဲဒါဆို ကိုယ့္ဟာကိုယ္ တည္ေဆာက္ထားတဲ့ 
thumb ဖိုင္ေလးနဲ႔ အစားထိုးၿပီးျဖစ္ပါတယ္ ၿပီးရင္ ဖုန္းကို reboot ခ် လိုက္ပါ gallery ထဲဝင္ၾကည့္ပါ 
ပံုေတြကိုစစ္ၾကည့့္ပါ မေပၚေသးရင္ေစာင့္ရပါမယ္ တခါတေလ ေတာ္ေတာ္ၾကာတတ္တယ္ data 
အနည္းအမ်ားေပၚမူတည္ပါတယ္ storage ကိုလည္းစစ္ထားပါ ၿပီးရင္ဖုန္းကိုပံုမွန္သံုးလို႔ရပါၿပီ 
အဓိပၸါယ္ကေတာ့ သူ႕ဟာသူ တက္တဲ့ thumb ဖိုင္ေနရာမွာ ကိုယ္တိုင္တည္ေဆာက္တဲ့ thumb 
ဖိုင္ကိုအစားထိုးလိုက္တာပါ အဲဒါကေတာ့ android forum ႐ွာၿပီးကြၽန္ေတာ္ 
သံုးလို႔အဆင္ေျပတဲ့နည္းေလးကိုေဝမ်ွလိုက္တာပါ အဆင္မေျပသူမ်ား႐ွိရင္ စိတ္မေကာင္းပါဘူး
ROOT EXPLORER  ေနာက္ဆံုးဘား႐ွင္းမ႐ွိေသးရင္ဒီေအာက္မွာဝင္ ဒါင္းပါ

 
MILOSHARE [ 2.3 MB ]


CREDIT TO KO PANN


www.myanmartechit.blogspot.com
(အေၿခခံနည္းပညာမ်ားၿပန္လည္မွ်ေဝျခင္း)
အဆင္ေၿပပါေစ။အဆင္ေၿပရင္facebook မွာ like လုပ္ပါအုံး။
အဆင္မေၿပရင္၊လိုအပ္တာရွိရင္ comment ေပါ့။


တရုပ္ဖုန္းေပါင္းမ်ားစြာကို Root ေဖာက္ေပးႏိုင္တဲ့ - VRoot v1.7.5.5379 (Update - Feb-14)


http://upload7.ir/images/80629213448327426548.png
Root Tools ေတြအမ်ားၾကီးရွိတဲ့အထဲမွာ VRoot ကေတာ့ နာမည္ၾကီးျပီး လူသံုးအမ်ားဆံုး Root Tool တစ္ခုပါ ဘဲ။ Phone Service သမားတိုင္း ေဆာင္ထားသင့္တဲ့ Software တစ္မ်ိဳးပါ။ အသံုးျပဳရတာလည္းလြယ္ကူ လို႕ သာမန္ User ေတြပါ မိမိအိမ္မွာ ကိုယ္တိုင္ Root ေဖာက္ႏိုင္ပါတယ္။ Click တစ္ခ်က္ႏွိပ္ရံုနဲ႕ သင့္ရဲ႕ဖုန္းဟာ Root Access ျဖစ္သြားမွာပါ။ Support လုပ္ႏိုင္တဲ့ ဖုန္းအမ်ိဳးအစားေတြကလည္းအမ်ားၾကီးပါ။ ၿခံဳငံုျပီးေျပာရ မယ္ဆိုရင္ တရုပ္ဖုန္းအားလံုးလိုလိုကို Root ေဖာက္ႏိုင္ပါတယ္။

 **  Step-1.ေအာက္က Download Button ကိုႏွိပ္လိုက္ပါ  
**  Step-2. "5sec". ေလာက္ေစာင္႕ေပးပါ။

**  Step-3. "  << SKIP AD >>   ".ကိုႏွိပ္ေပးပါ။
**  Step-4. Download Link က်လာပါလိမ္႕မယ္။
**  အဆင္ေျပပါေစဗ်ာ။


www.myanmartechit.blogspot.com
(အေၿခခံနည္းပညာမ်ားၿပန္လည္မွ်ေဝျခင္း)
အဆင္ေၿပပါေစ။အဆင္ေၿပရင္facebook မွာ like လုပ္ပါအုံး။
အဆင္မေၿပရင္၊လိုအပ္တာရွိရင္ comment ေပါ့။